Strategy
A guide to LinkedIn for small business owners
Starling business customer, Beesting Digital, is a content strategy agency. Following the success of their own organic LinkedIn strategy, here’s a guide to using LinkedIn for small business owners, written by their Director, Heather Murray.
When it comes to LinkedIn, most small business owners fall into two camps. The first of which set up a profile years ago to use as an online CV, but haven’t been back since. The second realise the platform’s value and have dabbled, but aren’t quite sure where to begin.
If you’re not quite converted yet, here are a few of LinkedIn’s statistics to catch your eye:
4 out of 5 LinkedIn members drive decisions within their business
40% of B2B marketers surveyed indicated LinkedIn as the most effective channel for driving high-quality leads
78% of social sellers outsell peers who don’t use social media
LinkedIn has evolved well beyond a recruitment platform. Whether you’re looking to drive brand awareness, encourage interaction, build relationships or generate leads, LinkedIn is a critical tool in the arsenal of any business professional, but can also work for small business owners in a variety of industries and sectors.
This guide is intended to help small business owners navigate the ever-changing world of LinkedIn. We’ll work through set-up, network growth, content creation and how to stand out.
Personal page vs company page
First things first: the power is in your personal profile. We’re not companies, we’re individuals and as a small business owner you are the brand - it’s this power that drives the strongest social selling strategies on LinkedIn.
Company pages are certainly useful, but this guide focuses on personal profiles only.
Step 1: Your profile
Your profile operates like a mini personal website or some would say a digital business card. Whether or not you’re active on LinkedIn, your customers and prospects will be looking at it.
Header image
Your header or banner image is the first thing visitors see when they view your profile. For some, more service-related businesses, this can make a great free banner ad, and include the following information:
Business name
Key services
Website URL
Call to action, e.g. DM me / email me
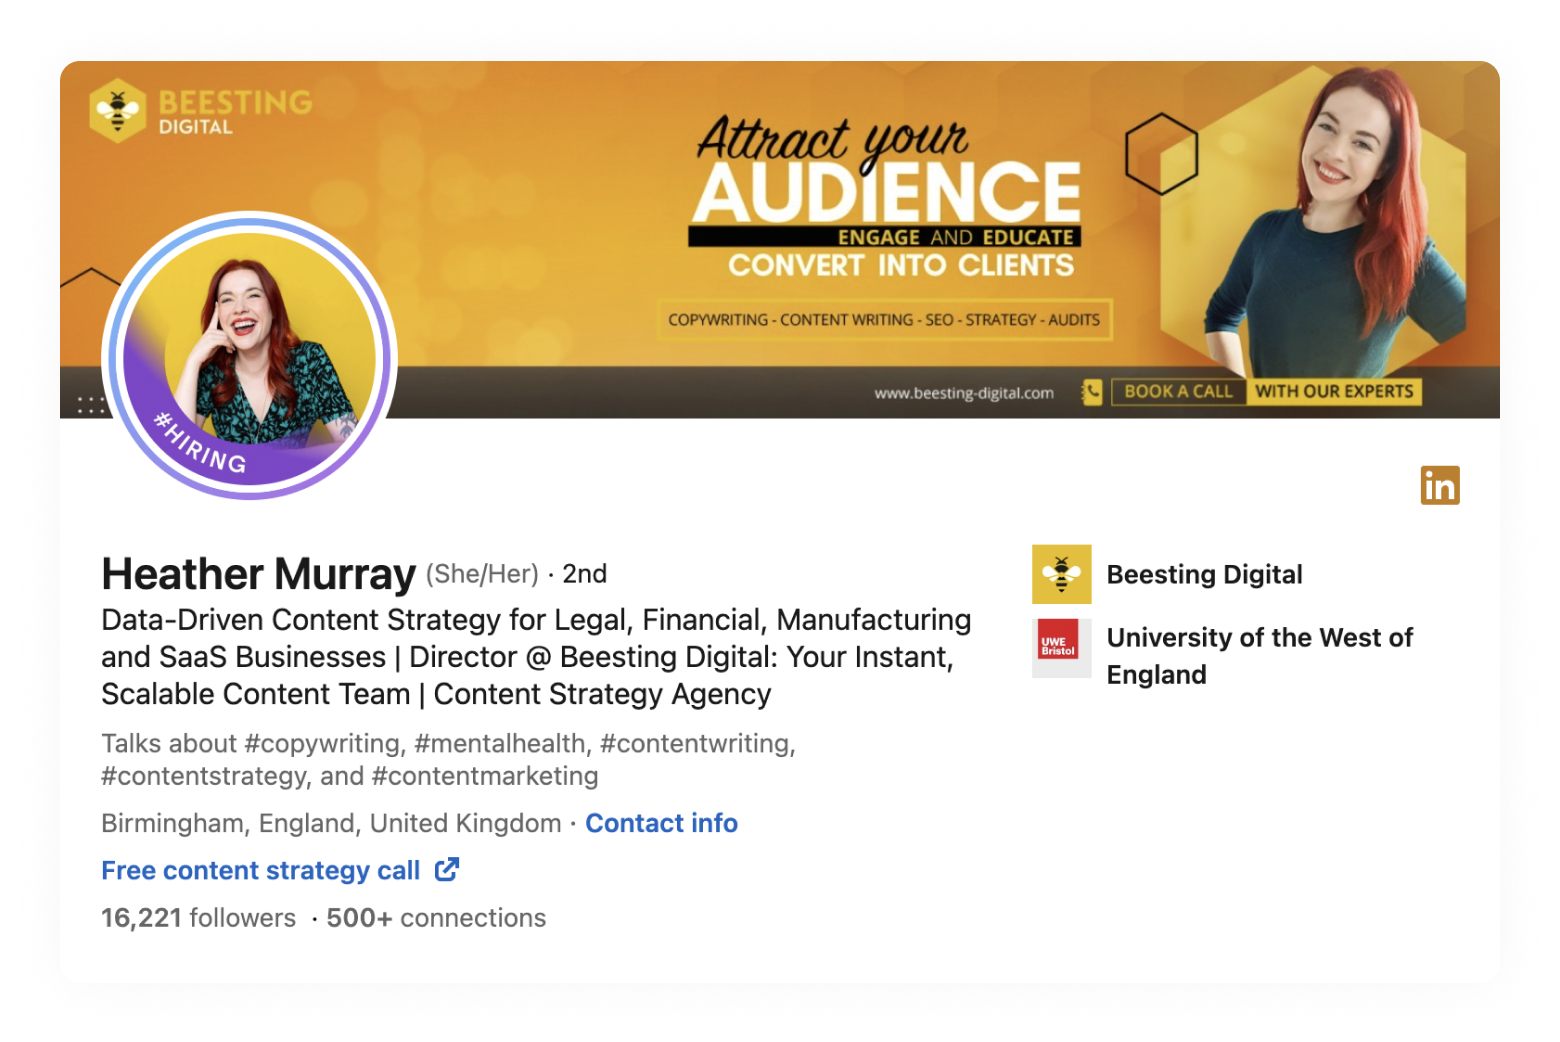
For others, this space could be used to showcase your product, for example a cake maker or designer could use the header image for a gallery of their creations. Here's what mine looks like:

Profile image
Whether posting your own content, leaving a comment or sending a message, there are two features that follow you around LinkedIn: your profile image and your headline (see below). They need to attract attention and properly represent who you are and what you do.
Your profile image should:
Be a clear head/head and shoulders shot with a clean, uncluttered background
Have a bright, positive facial expression
Show you in clothes you’d wear to a client meeting
Tip: No designer? No worries. There are some excellent free tools, such as Canva, for non-designers looking to create headers, edit their profile photo and much more.
The headline
Your headline is your own personal strapline. Try to include:
What you dox
Who you do it for
How you create value
Why you’re different
You can choose one clear line:
Stunning Organic Wedding Cakes For Couples Looking For That Wow
Or separate yours into sections, for example:
Helping single mums regain workplace confidence | Confidence coaching | Interview practice | Master NLP Practitioner | DM me
Tip: Only the first ten or so words show outside of your profile page, put all the vital stuff here.
Here’s how my profile looks:

Featured section
Outside of your header and profile image, this is the main visual area. You’ll find it if you scroll down just a little. You can link web pages, PDF brochures, well-performing posts, images, whatever you want.
Employment history
You don’t need to delve deep into your first ever job here, just add details of relevant positions, and include links to brochures/images if you can.
Endorsements
This is your social proof. Request endorsements from your current and ex-colleagues, suppliers or customers and offer them one in exchange.
Step 2: Your network
What is your network?
Now that you have a solid profile, it’s time to start curating the people you’d like to see it. Your network is split into two sections:
Connections
Followers
The only real difference between them is any more than 500 connections simply shows as “more than 500 connections” on your profile, while an exact follower account is public regardless of the number.

So, all of your followers and connections will see your content, right? Wrong. That tricky algorithm only displays your content to a small proportion of your audience.
How to grow your network
It changes regularly, but currently, LinkedIn users are restricted to sending a max of 100 connection requests per week. To maximise your connection count, follow these steps:
Do
Read their profile first, pick out talking points
Send unique, personal messages for each request
Don’t
Send no message at all
Talk about yourself or immediately pitch your services – it’s all about them
We’ve found that with quality connection messages, you can expect around a 30% positive response rate. Remember, a big chunk of those negative responses simply have inactive accounts and won’t ever see your request.
Tip: Remember to withdraw your sent requests every month or so
How do the influencers get such huge networks?
Do the maths, and you’ll realise that even with great connection request messages, it would take decades to reach the 200k connection/follower counts that the big ‘Linked Influencers’ have. They don’t have access to any more connection requests than anybody else. So how do they do it? They encourage inbound requests and follows by:
Creating thoughtful content
Actively encouraging people to connect with them
Spending serious time engaging with others
Running events: Lives and webinars with large audiences
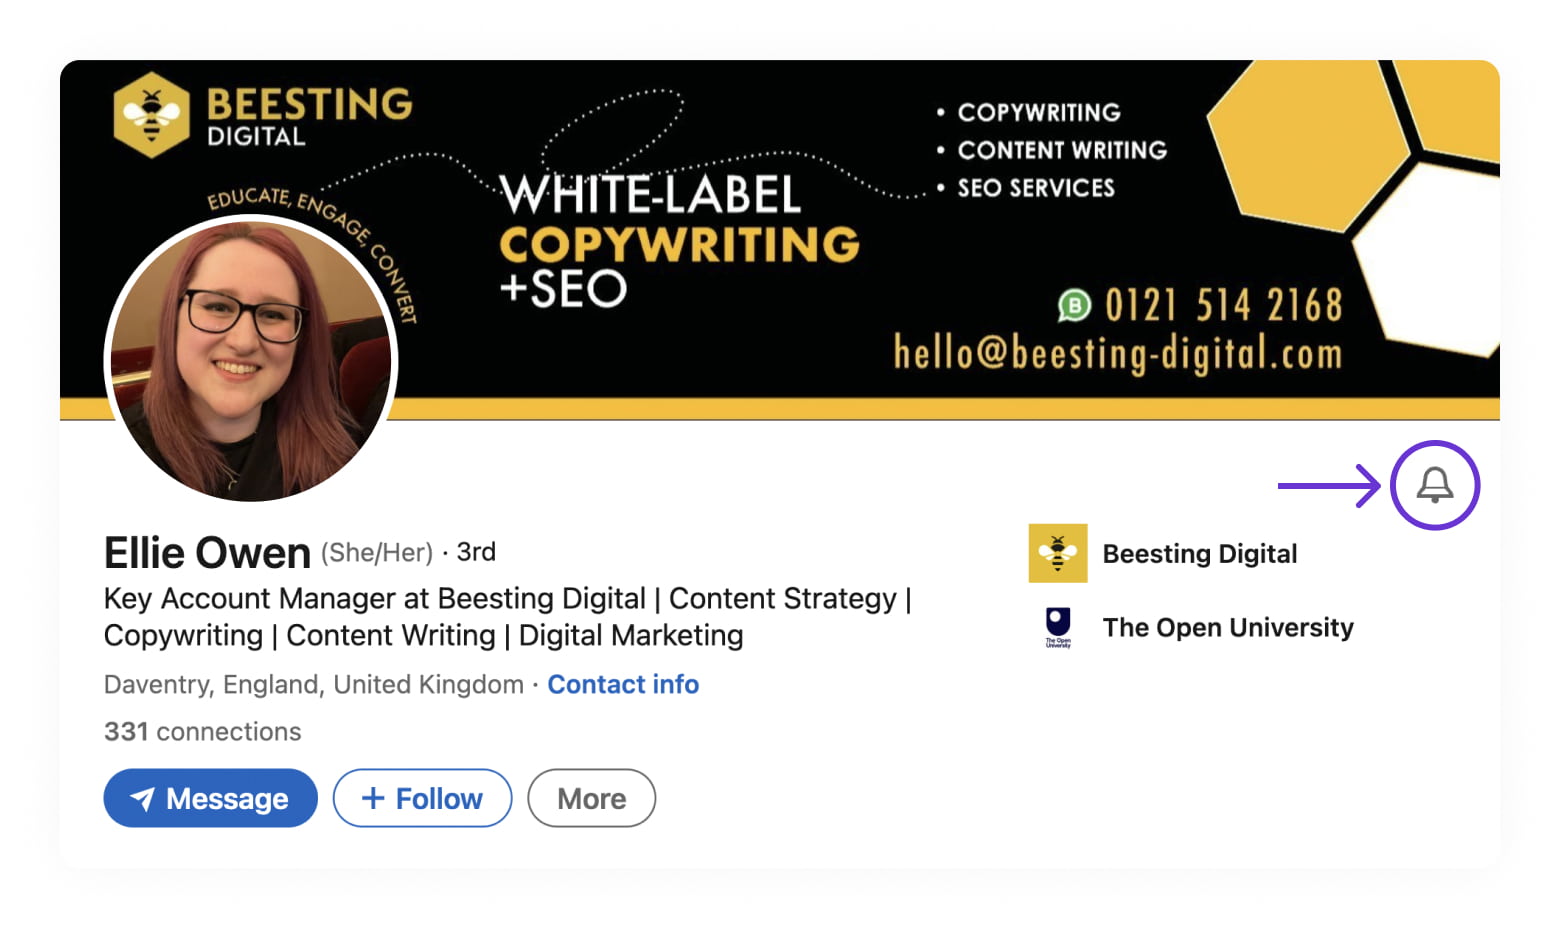
Bell ringing
Even if you’re following or connected to someone, there’s no guarantee you’ll see their content when they post. The bell feature gets around this by notifying followers whenever new content is available.
It’s very useful for:
Following someone who creates inspirational content
Making sure you always see when a colleague posts
Following a dream prospect and creating opportunities to engage with them
To ring someone’s bell, follow them and their bell will appear.

Step 3: Creating content
Only 2% of LinkedIn users create content regularly, so if you’re regularly creating content, you’re head and shoulders above the rest.
But remember:
Write as a person, not a business
Balance your posts with a glimpse into who you are. For example, I talk about my love of escape rooms, my beloved dog, my anxiety disorder and mental health in general, and what it’s like to be a female founder running my first business.
Split your content into the buyer journey
It’s important to keep a balance of value, or your audience will quickly switch off.
I use the following ratio:
60% Awareness – educational, engaging content offering insight into my specialist areas, asking nothing in return
10% Consideration – talking about my business without overly selling: case studies, testimonials, new recruits, business and social events
10% Conversion – this is where I talk about our services, pricing, offers and discounts
20% Personal – see above point
Make your posts easy to read
People are scanning through their feeds, so:
Use original, candid images where possible
Break your post into bite size chunks: short paragraphs, punchy sentences, bullet points
Aim for 1200 – 1600 characters
Include a clear call to action at the end
Step 4: Engagement
At its core, LinkedIn is about building relationships – you simply can’t succeed unless you’re engaging with others.
Spend as long as you can each day:
Scrolling through your Home feed
Leaving insightful comments on others’ posts, offering your unique point of view where necessary
Send private messages with curiosity and personality, not sales pitches
Ask questions: in your own posts, on others’ posts and in private messages
Tip: Engage with those who have big networks to get more visibility. Keep a list and ring their profile bell.
In conclusion, LinkedIn takes time and effort, but put the work in and the platform pays dividends, getting you directly in front of those all-important decision-makers.